20 KiB
Angular Tutorial - Part I
About this Tutorial
In this tutorial series, you will build an application that is used to manage a list of books & their authors. Angular will be used as the UI framework and MongoDB will be used as the database provider.
This is the first part of the Angular tutorial series. See all parts:
- Part I: Create the project and a book list page (this tutorial)
- Part II: Create, Update and Delete books
- Part III: Integration Tests
You can access to the source code of the application from the GitHub repository.
Creating the Project
Create a new project named Acme.BookStore by selecting the Angular as the UI framework and MongoDB as the database provider, create the database and run the application by following the Getting Started document.
Solution Structure (Backend)
This is how the layered solution structure looks after it's created:

You can see the Application template document to understand the solution structure in details. However, you will understand the basics with this tutorial.
Create the Book Entity
Domain layer in the startup template is separated into two projects:
Acme.BookStore.Domaincontains your entities, domain services and other core domain objects.Acme.BookStore.Domain.Sharedcontains constants, enums or other domain related objects those can be shared with clients.
Define entities in the domain layer (Acme.BookStore.Domain project) of the solution. The main entity of the application is the Book. Create a class, named Book, in the Acme.BookStore.Domain project as shown below:
using System;
using Volo.Abp.Domain.Entities.Auditing;

namespace Acme.BookStore
{
    public class Book : AuditedAggregateRoot<Guid>
    {
        public string Name { get; set; }

        public BookType Type { get; set; }

        public DateTime PublishDate { get; set; }

        public float Price { get; set; }
    }
}
- ABP has two fundamental base classes for entities:
AggregateRootandEntity. Aggregate Root is one of the Domain Driven Design (DDD) concepts. See entity document for details and best practices. Bookentity inheritsAuditedAggregateRootwhich adds some auditing properties (CreationTime,CreatorId,LastModificationTime... etc.) on top of theAggregateRootclass.Guidis the primary key type of theBookentity.
BookType Enum
Define the BookType enum in the Acme.BookStore.Domain.Shared project:
namespace Acme.BookStore
{
    public enum BookType
    {
        Undefined,
        Adventure,
        Biography,
        Dystopia,
        Fantastic,
        Horror,
        Science,
        ScienceFiction,
        Poetry
    }
}
Add Book Entity to Your DbContext
Add a IMongoCollection property to the BookStoreMongoDbContext inside the Acme.BookStore.MongoDB project:
public class BookStoreMongoDbContext : AbpMongoDbContext
{
    public IMongoCollection<Book> Books => Collection<Book>();
    ...
}
Add Seed (Sample) Data
This section is optional, but it would be good to have an initial data in the database in the first run. ABP provides a data seed system. Create a class deriving from the IDataSeedContributor in the .Domain project:
using System;
using System.Threading.Tasks;
using Volo.Abp.Data;
using Volo.Abp.DependencyInjection;
using Volo.Abp.Domain.Repositories;

namespace Acme.BookStore
{
    public class BookStoreDataSeederContributor
        : IDataSeedContributor, ITransientDependency
    {
        private readonly IRepository<Book, Guid> _bookRepository;

        public BookStoreDataSeederContributor(IRepository<Book, Guid> bookRepository)
        {
            _bookRepository = bookRepository;
        }

        public async Task SeedAsync(DataSeedContext context)
        {
            if (await _bookRepository.GetCountAsync() > 0)
            {
                return;
            }

            await _bookRepository.InsertAsync(
                new Book
                {
                    Name = "1984",
                    Type = BookType.Dystopia,
                    PublishDate = new DateTime(1949, 6, 8),
                    Price = 19.84f
                }
            );

            await _bookRepository.InsertAsync(
                new Book
                {
                    Name = "The Hitchhiker's Guide to the Galaxy",
                    Type = BookType.ScienceFiction,
                    PublishDate = new DateTime(1995, 9, 27),
                    Price = 42.0f
                }
            );
        }
    }
}
BookStoreDataSeederContributor simply inserts two books into database if there is no book added before. ABP automatically discovers and executes this class when you seed the database by running the Acme.BookStore.DbMigrator project.
Create the Application Service
The next step is to create an application service to manage (create, list, update, delete...) the books. Application layer in the startup template is separated into two projects:
Acme.BookStore.Application.Contractsmainly contains your DTOs and application service interfaces.Acme.BookStore.Applicationcontains the implementations of your application services.
BookDto
Create a DTO class named BookDto into the Acme.BookStore.Application.Contracts project:
using System;
using Volo.Abp.Application.Dtos;

namespace Acme.BookStore
{
    public class BookDto : AuditedEntityDto<Guid>
    {
        public string Name { get; set; }

        public BookType Type { get; set; }

        public DateTime PublishDate { get; set; }

        public float Price { get; set; }
    }
}
- DTO classes are used to transfer data between the presentation layer and the application layer. See the Data Transfer Objects document for more details.
BookDtois used to transfer book data to the presentation layer in order to show the book information on the UI.BookDtois derived from theAuditedEntityDto<Guid>which has audit properties just like theBookclass defined above.
It will be needed to convert Book entities to BookDto objects while returning books to the presentation layer. AutoMapper library can automate this conversion when you define the proper mapping. Startup template comes with AutoMapper configured, so you can just define the mapping in the BookStoreApplicationAutoMapperProfile class in the Acme.BookStore.Application project:
using AutoMapper;

namespace Acme.BookStore
{
    public class BookStoreApplicationAutoMapperProfile : Profile
    {
        public BookStoreApplicationAutoMapperProfile()
        {
            CreateMap<Book, BookDto>();
        }
    }
}
CreateUpdateBookDto
Create a DTO class named CreateUpdateBookDto into the Acme.BookStore.Application.Contracts project:
using System;
using System.ComponentModel.DataAnnotations;

namespace Acme.BookStore
{
    public class CreateUpdateBookDto
    {
        [Required]
        [StringLength(128)]
        public string Name { get; set; }

        [Required]
        public BookType Type { get; set; } = BookType.Undefined;

        [Required]
        public DateTime PublishDate { get; set; }

        [Required]
        public float Price { get; set; }
    }
}
- This DTO class is used to get book information from the user interface while creating or updating a book.
- It defines data annotation attributes (like
[Required]) to define validations for the properties. DTOs are automatically validated by the ABP framework.
Next, add a mapping in BookStoreApplicationAutoMapperProfile from the CreateUpdateBookDto object to the Book entity:
CreateMap<CreateUpdateBookDto, Book>();
IBookAppService
Define an interface named IBookAppService in the Acme.BookStore.Application.Contracts project:
using System;
using Volo.Abp.Application.Dtos;
using Volo.Abp.Application.Services;

namespace Acme.BookStore
{
    public interface IBookAppService :
        ICrudAppService< //Defines CRUD methods
            BookDto, //Used to show books
            Guid, //Primary key of the book entity
            PagedAndSortedResultRequestDto, //Used for paging/sorting on getting a list of books
            CreateUpdateBookDto, //Used to create a new book
            CreateUpdateBookDto> //Used to update a book
    {

    }
}
- Defining interfaces for application services is not required by the framework. However, it's suggested as a best practice.
ICrudAppServicedefines common CRUD methods:GetAsync,GetListAsync,CreateAsync,UpdateAsyncandDeleteAsync. It's not required to extend it. Instead, you could inherit from the emptyIApplicationServiceinterface and define your own methods manually.- There are some variations of the
ICrudAppServicewhere you can use separated DTOs for each method.
BookAppService
Implement the IBookAppService as named BookAppService in the Acme.BookStore.Application project:
using System;
using Volo.Abp.Application.Dtos;
using Volo.Abp.Application.Services;
using Volo.Abp.Domain.Repositories;

namespace Acme.BookStore
{
    public class BookAppService :
        CrudAppService<Book, BookDto, Guid, PagedAndSortedResultRequestDto,
                            CreateUpdateBookDto, CreateUpdateBookDto>,
        IBookAppService
    {
        public BookAppService(IRepository<Book, Guid> repository)
            : base(repository)
        {

        }
    }
}
BookAppServiceis derived fromCrudAppService<...>which implements all the CRUD methods defined above.BookAppServiceinjectsIRepository<Book, Guid>which is the default repository for theBookentity. ABP automatically creates default repositories for each aggregate root (or entity). See the repository document.BookAppServiceusesIObjectMapperto convertBookobjects toBookDtoobjects andCreateUpdateBookDtoobjects toBookobjects. The Startup template uses the AutoMapper library as the object mapping provider. You defined the mappings before, so it will work as expected.
Auto API Controllers
You normally create Controllers to expose application services as HTTP API endpoints. Thus allowing browser or 3rd-party clients to call them via AJAX. ABP can automagically configures your application services as MVC API Controllers by convention.
Swagger UI
The startup template is configured to run the swagger UI using the Swashbuckle.AspNetCore library. Run the Acme.BookStore.HttpApi.Host application and enter https://localhost:XXXX/swagger/ (replace XXXX by your own port) as URL on your browser.
You will see some built-in service endpoints as well as the Book service and its REST-style endpoints:

Swagger has a nice UI to test APIs. You can try to execute the [GET] /api/app/book API to get a list of books.
Create the Books Page
In this tutorial;
- Angular CLI will be used to create modules, components and services
- NGXS will be used as the state management library
- Ng Bootstrap will be used as the UI component library.
- Visual Studio Code will be used as the code editor (you can use your favorite editor).
Install NPM Packages
Open a terminal window and go to angular folder and then run yarn command for installing NPM packages:
yarn
BooksModule
Run the following command line to create a new module, named BooksModule:
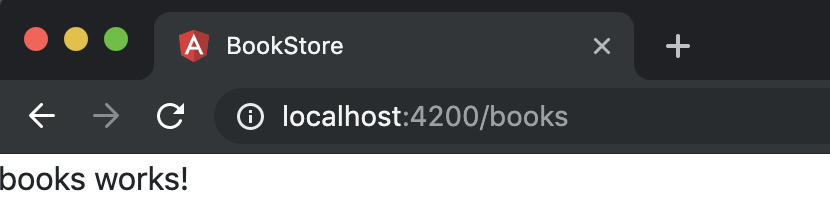
yarn ng generate module books --route books --module app.module

Run yarn start, wait Angular to run the application and open http://localhost:4200/books on a browser:
Routing
Open the app-routing.module.ts and replace books as shown below:
import { ApplicationLayoutComponent } from '@abp/ng.theme.basic';

//...
{
  path: 'books',
  component: ApplicationLayoutComponent,
  loadChildren: () => import('./books/books.module').then(m => m.BooksModule),
  data: {
    routes: {
      name: 'Books',
    } as ABP.Route,
  },
},
ApplicationLayoutComponent configuration sets the application layout to the new page. If you would like to see your route on the navigation bar (main menu) you must also add the data object with name property in your route.

Book List Component
First, replace the books.component.html to the following line to place the router-outlet:
<router-outlet></router-outlet>
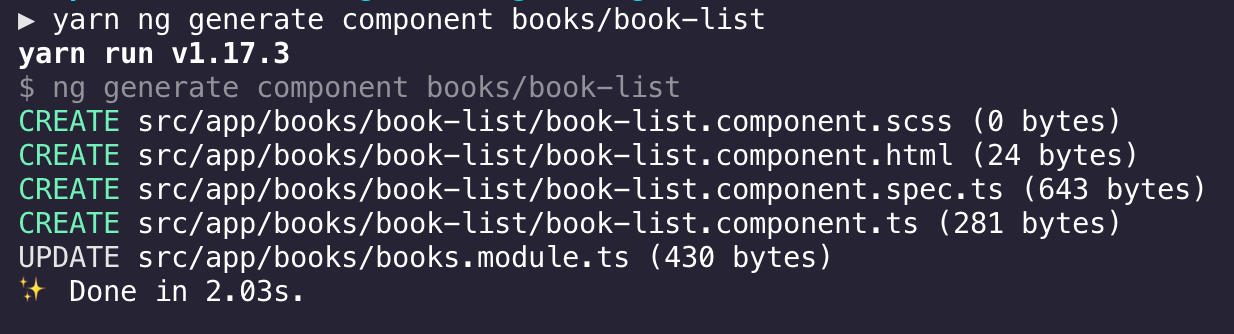
Then run the command below on the terminal in the root folder to generate a new component, named book-list:
yarn ng generate component books/book-list
Import the SharedModule to the BooksModule to reuse some components and services defined in:
import { SharedModule } from '../shared/shared.module';

@NgModule({
  //...
  imports: [
    //...
    SharedModule,
  ],
})
export class BooksModule {}
Then, update the routes in the books-routing.module.ts to add the new book-list component:
import { BookListComponent } from './book-list/book-list.component';

const routes: Routes = [
  {
    path: '',
    component: BooksComponent,
    children: [{ path: '', component: BookListComponent }],
  },
];

@NgModule({
  imports: [RouterModule.forChild(routes)],
  exports: [RouterModule],
})
export class BooksRoutingModule {}

Create BooksState
Run the following command in the terminal to create a new state, named BooksState:
yarn ng generate ngxs-schematic:state books
This command creates several new files and edits app.modules.ts to import the NgxsModule with the new state:
// app.module.ts

import { BooksState } from './store/states/books.state';

@NgModule({
  imports: [
    //...
    NgxsModule.forRoot([BooksState]),
  ],
  //...
})
export class AppModule {}
Get Books Data from Backend
First, create data types to map data returning from the backend (you can check swagger UI or your backend API to know the data format).
Modify the books.ts as shown below:
export namespace Books {
  export interface State {
    books: Response;
  }

  export interface Response {
    items: Book[];
    totalCount: number;
  }

  export interface Book {
    name: string;
    type: BookType;
    publishDate: string;
    price: number;
    lastModificationTime: string;
    lastModifierId: string;
    creationTime: string;
    creatorId: string;
    id: string;
  }

  export enum BookType {
    Undefined,
    Adventure,
    Biography,
    Dystopia,
    Fantastic,
    Horror,
    Science,
    ScienceFiction,
    Poetry,
  }
}
Added Book interface that represents a book object and BookType enum represents a book category.
BooksService
Now, create a new service, named BooksService to perform HTTP calls to the server:
yarn ng generate service books/shared/books

Modify books.service.ts as shown below:
import { Injectable } from '@angular/core';
import { RestService } from '@abp/ng.core';
import { Books } from '../../store/models';
import { Observable } from 'rxjs';

@Injectable({
  providedIn: 'root',
})
export class BooksService {
  constructor(private restService: RestService) {}

  get(): Observable<Books.Response> {
    return this.restService.request<void, Books.Response>({
      method: 'GET',
      url: '/api/app/book'
    });
  }
}
Added the get method to get the list of books by performing an HTTP request to the related endpoint.
Replace books.actions.ts content as shown below:
export class GetBooks {
  static readonly type = '[Books] Get';
}
Implement the BooksState
Open the books.state.ts and change the file as shown below:
import { State, Action, StateContext, Selector } from '@ngxs/store';
import { GetBooks } from '../actions/books.actions';
import { Books } from '../models/books';
import { BooksService } from '../../books/shared/books.service';
import { tap } from 'rxjs/operators';

@State<Books.State>({
  name: 'BooksState',
  defaults: { books: {} } as Books.State,
})
export class BooksState {
  @Selector()
  static getBooks(state: Books.State) {
    return state.books.items || [];
  }

  constructor(private booksService: BooksService) {}

  @Action(GetBooks)
  get(ctx: StateContext<Books.State>) {
    return this.booksService.get().pipe(
      tap(booksResponse => {
        ctx.patchState({
          books: booksResponse,
        });
      }),
    );
  }
}
Added the GetBooks action that uses the BookService defined above to get the books and patch the state.
NGXS requires to return the observable without subscribing it, as done in this sample (in the get function).
BookListComponent
Modify the book-list.component.ts as shown below:
import { Component, OnInit } from '@angular/core';
import { Store, Select } from '@ngxs/store';
import { BooksState } from '../../store/states';
import { Observable } from 'rxjs';
import { Books } from '../../store/models';
import { GetBooks } from '../../store/actions';

@Component({
  selector: 'app-book-list',
  templateUrl: './book-list.component.html',
  styleUrls: ['./book-list.component.scss'],
})
export class BookListComponent implements OnInit {
  @Select(BooksState.getBooks)
  books$: Observable<Books.Book[]>;

  booksType = Books.BookType;

  loading = false;

  constructor(private store: Store) {}

  ngOnInit() {
    this.loading = true;
    this.store.dispatch(new GetBooks()).subscribe(() => {
      this.loading = false;
    });
  }
}
See the Dispatching Actions and Select on the NGXS documentation for more information on these NGXS features.
Replace book-list.component.html content as shown below:
<div id="wrapper" class="card">
  <div class="card-header">
    <div class="row">
      <div class="col col-md-6">
        <h5 class="card-title">
          Books
        </h5>
      </div>
    </div>
  </div>
  <div class="card-body">
    <p-table [value]="books$ | async" [loading]="loading" [paginator]="true" [rows]="10">
      <ng-template pTemplate="header">
        <tr>
          <th>Book name</th>
          <th>Book type</th>
          <th>Publish date</th>
          <th>Price</th>
        </tr>
      </ng-template>
      <ng-template pTemplate="body" let-data>
        <tr>
          <td>{%{{{ data.name }}}%}</td>
          <td>{%{{{ booksType[data.type] }}}%}</td>
          <td>{%{{{ data.publishDate | date }}}%}</td>
          <td>{%{{{ data.price }}}%}</td>
        </tr>
      </ng-template>
    </p-table>
  </div>
</div>
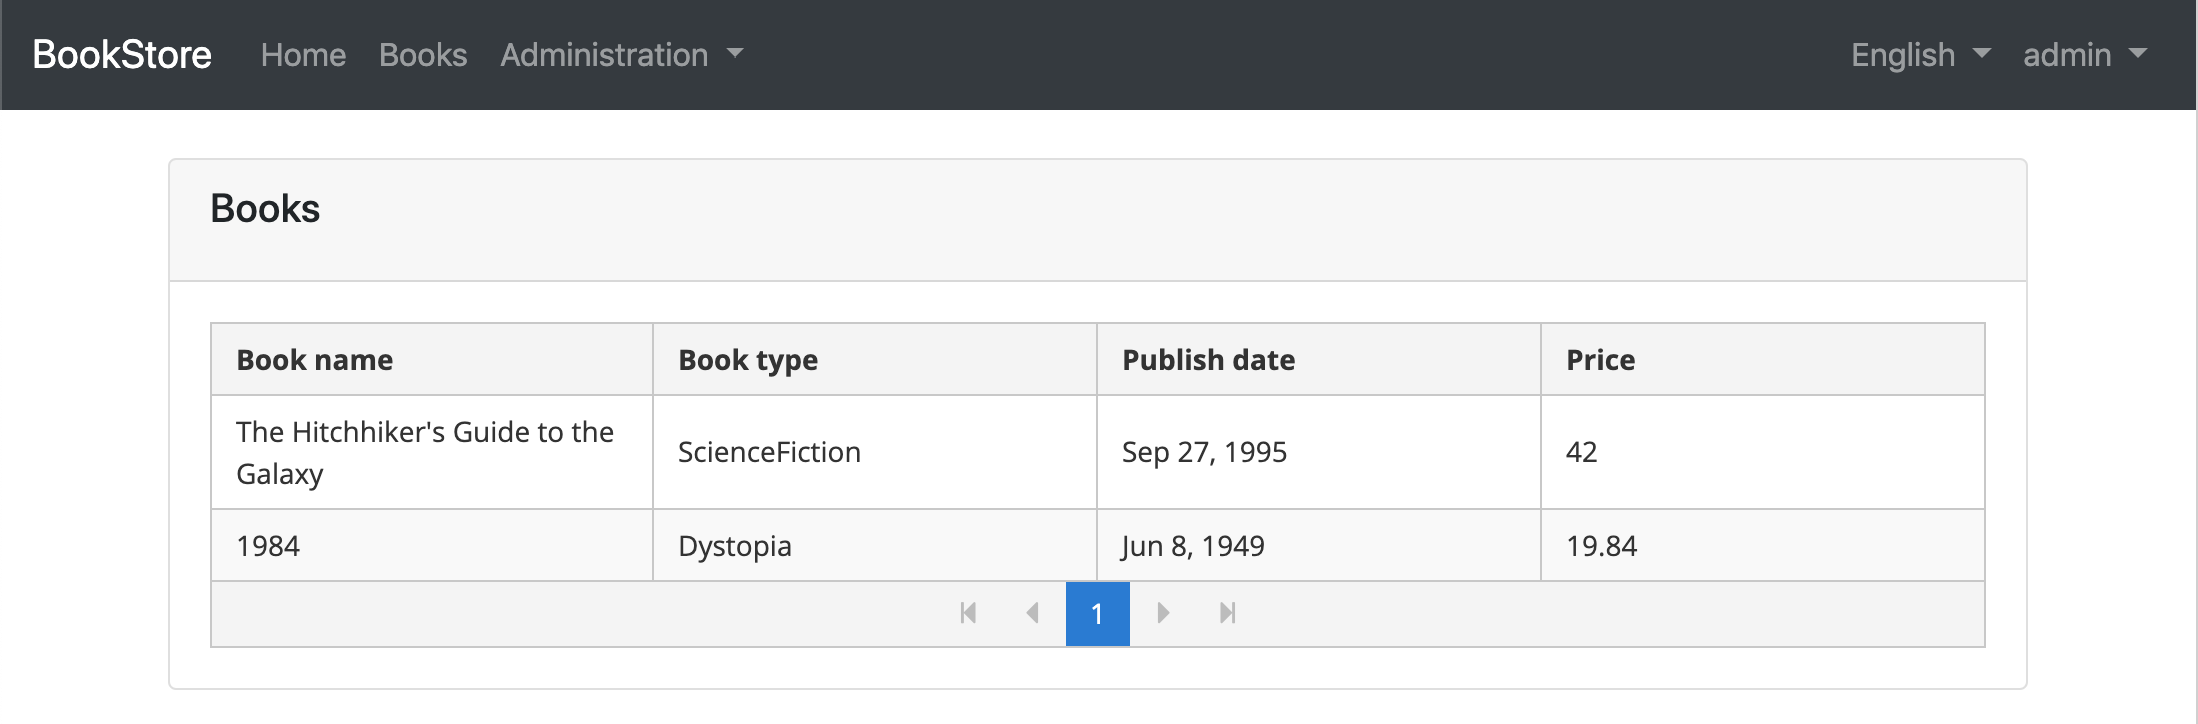
We've used PrimeNG table in this component.
The resulting books page is shown below:
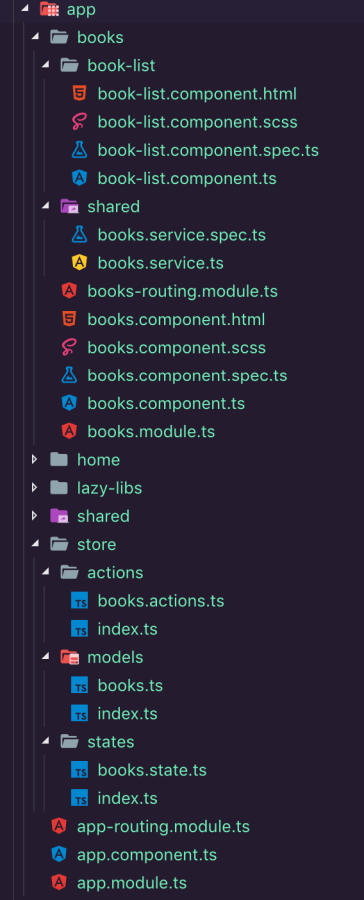
And this is the folder & file structure by the end of this tutorial:
This tutorial follows the Angular Style Guide.
Next Part
See the next part of this tutorial.