6.5 KiB
How to Add Custom Properties to the User Entity
Introduction
In this step-by-step article, I will explain how you can customize the user entity class, which is available in every web application you create using the ABP framework, according to your needs. When you read this article, you will learn how to override the services of built-in modules, extend the entities, extend data transfer objects and customize the user interface in the applications you develop using the ABP framework.
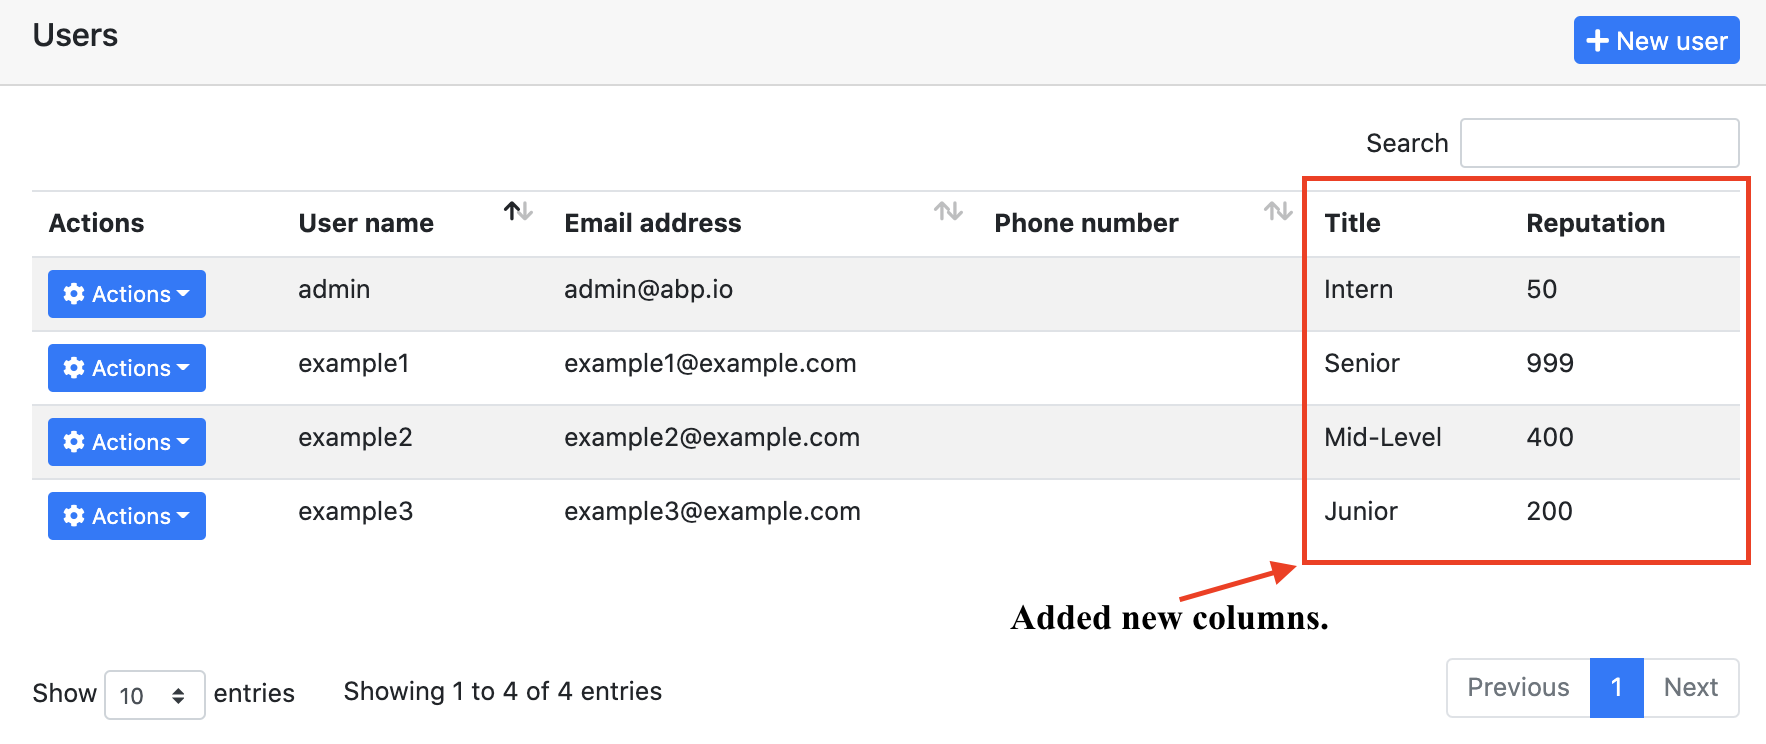
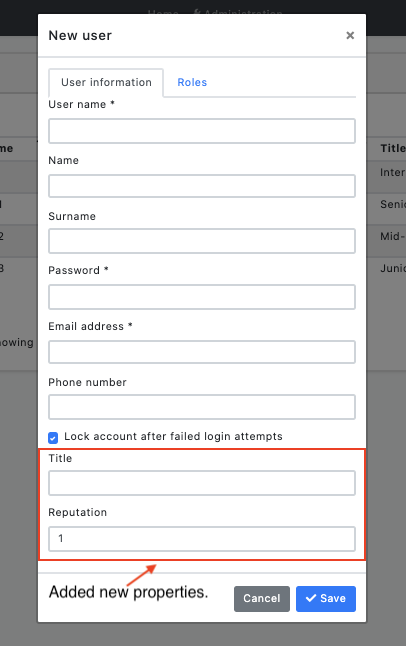
You can see the screenshots below which we will reach at the end of the article.
Preparing the Project
Startup template and the initial run
Abp Framework offers startup templates to get into the work faster. We can create a new startup template using Abp CLI:
abp new CustomizeUserDemo
In this article, I will go through the MVC application, but it will work also in the Angular application.
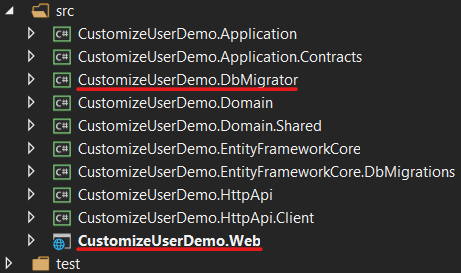
After the download is finished, we can run CustomizeUserDemo.DbMigrator project to create the database migrations and seed the initial data (admin user, role, etc). Then we can run CustomizeUserDemo.Web to see that our application is working.
Default admin username is admin and password is 1q2w3E*
In this article, we will go through a scenario together and find the solutions to our questions through this scenario. However, since the scenario is not a real-life scenario, it may be strange, please don't get too about this issue :)
Step-1
Add two new properties to the AppUser in the Users folder of the CustomizeUserDemo.Domain project as follows:
public string Title { get; protected set; }

public int Reputation { get; protected set; }
Step-2
Create the Users folder in the CustomizeUserDemo.Domain.Shared project, create the class UserConsts inside the folder and update the class you created as below:
public static class UserConsts
{
    public const string TitlePropertyName = "Title";

    public const string ReputationPropertyName = "Reputation";

    public const int MaxTitleLength = 64;

    public const double MaxReputationValue = 1_000;

    public const double MinReputationValue = 1;
}
Step-3
Update the CustomizeUserDemoEfCoreEntityExtensionMappings class in the CustomizeUserDemo.EntityFramework project in the EntityFrameworkCore folder as below:
public static class CustomizeUserDemoEfCoreEntityExtensionMappings
{
    private static readonly OneTimeRunner OneTimeRunner = new OneTimeRunner();

    public static void Configure()
    {
        CustomizeUserDemoGlobalFeatureConfigurator.Configure();
        CustomizeUserDemoModuleExtensionConfigurator.Configure();

        OneTimeRunner.Run(() =>
        {
            ObjectExtensionManager.Instance
                .MapEfCoreProperty<IdentityUser, string>(
                    nameof(AppUser.Title),
                    (entityBuilder, propertyBuilder) =>
                    {
                        propertyBuilder.IsRequired();
                        propertyBuilder.HasMaxLength(UserConsts.MaxTitleLength);
                    }
                ).MapEfCoreProperty<IdentityUser, int>(
                    nameof(AppUser.Reputation),
                    (entityBuilder, propertyBuilder) =>
                    {
                        propertyBuilder.HasDefaultValue(UserConsts.MinReputationValue);
                    }
                );
        });
    }
}
This class can be used to map these extra properties to table fields in the database. Please read this article to improve your understanding of what we are doing.
So far, we have added our extra features to the User entity and matched these features with the ef core.
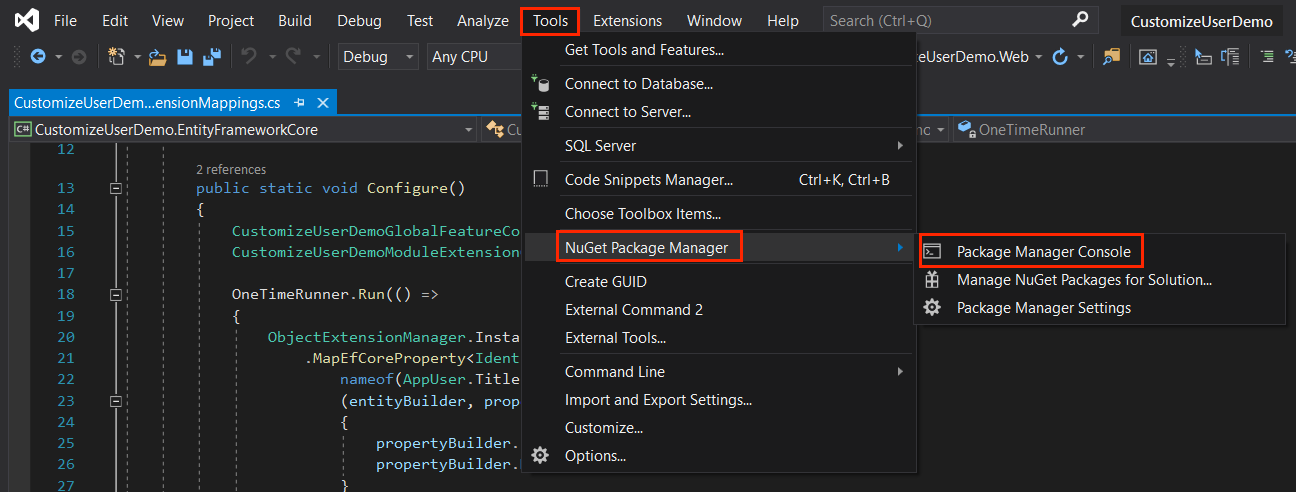
Now we need to add migration to see what has changed in our database. This for, open the Package Manager Console (PMC) under the menu Tools > NuGet Package Manager.
Select the CustomizeUserDemo.EntityFramework.DbMigrations as the default project and execute the following command:
Add-Migration "Updated-User-Entity"
This will create a new migration class inside the Migrations folder of the CustomizeUserDemo.EntityFrameworkCore.DbMigrations project.
If you are using another IDE than the Visual Studio, you can use
dotnet-eftool as documented here.
Finally, run the CustomizeUserDemo.DbMigrator project to update the database.
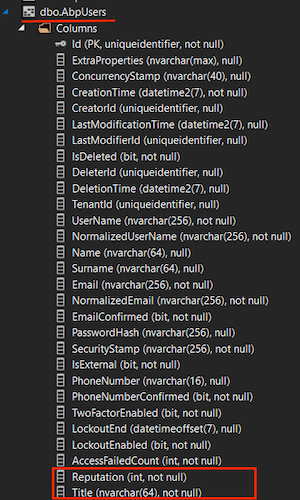
When we updated the database, you can see that the Title and Reputation columns are added to the Users table.
Step-4
Open the CustomizeUserDemoModuleExtensionConfigurator in the CustomizeUserDemo.Domain.Shared project, and change the contents of the ConfigureExtraProperties method as shown below:
private static void ConfigureExtraProperties()
{
    ObjectExtensionManager.Instance.Modules().ConfigureIdentity(identity =>
    {
        identity.ConfigureUser(user =>
        {
            user.AddOrUpdateProperty<string>(
                UserConsts.TitlePropertyName,
                options =>
                {
                    options.Attributes.Add(new RequiredAttribute());
                    options.Attributes.Add(
                        new StringLengthAttribute(UserConsts.MaxTitleLength)
                    );
                }
            );
            user.AddOrUpdateProperty<int>(
                UserConsts.ReputationPropertyName,
                options =>
                {
                    options.DefaultValue = UserConsts.MinReputationValue;
                    options.Attributes.Add(
                        new RangeAttribute(UserConsts.MinReputationValue, UserConsts.MaxReputationValue)
                    );
                }
            );
        });
    });
}
That's it. Now let's run the application and look at the Identity user page. You can also try to edit and recreate a record if you want, it will work even though we haven't done anything extra. Here is the magic code behind ABP framework.
If there is a situation you want to add, you can click the contribute button or make a comment. Also, if you like the article, don't forget to share it :)
Happy coding :)
